One of the most important and yet least cared for is the bike chain- namely, how to clean a chain. Thus, we decided to create a series of articles based entirely around bike maintenance for all your commuter or dirt racing needs. Below, we discuss how to clean your bicycle chain, so that you can get the most out of your bike, with the least effort from yourself.
Why You Should Clean Your Bike Chain
If you’ve never cleaned your bike chain before, you might be wondering what the whole point it. After all, the chain is cleaned and lubed when it comes from the manufacturer, right? Well, those factory lubes (and every other lube, in all fairness) wear away over time.
Every time your chain works it’s way over the drivetrain, the lube wears a little. Especially when the incorrect lube is used (you can read more about the best bike chain lube in our article which goes in depth about the effects of poor lubrication), which often leads to the grease breaking down, faster.
Once the bike lubricant has gone, and the chain is no longer protected, you’ll find that the chain itself starts to become bogged down with grime. This can make it harder to cycle, the chain also becomes a lot noisier (a good first sign that you need to clean your bike chain) and eventually can cause secondary problems with the components which rely upon the upkeep of your chain.
Before You Get Started
We’re firm believers in getting everything together before you start, as well as being prepared to handle the mess and muck that comes with handling your bike maintenance. Not to mention that everyone has a different method of living – some prefer to be extremely thorough, while others like to get in-depth and thoroughly detailed with their cleaning.
At the very least, you will need the best bike chain degreaser available, as well as he best bike chain lube and the appropriate method of application for your choice in these. You will also need the following:
- Gloves
These need to be ideal for protecting you from the muck that comes with awkward liquid applications, yet flexible enough to not hold you back from getting into the nooks and crannies of the bike.
- Chain Brush
When standard elbow grease won’t cut it, a good quality chain brush will help you shift off stubborn grime and grease. They can also get into tighter spaces, like in between each link.
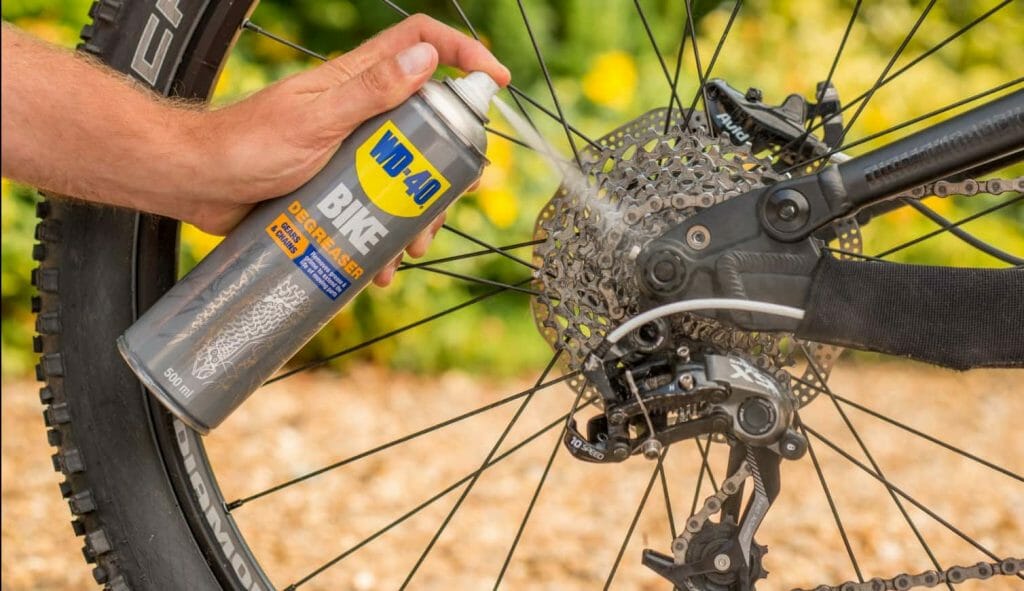
- De-greaser
These work as a heavy-duty cleaner but removing any and all oils, lubricants and muck from your bike. You can consider this a step up from standard bike wash, which won’t cut through grease but can get rid of surface dirt.
- Lube
You’ll need this to ensure your chain moves smoothly and efficiently after the grease has been washed away. There are three different types (wet, dry and wax) which you’ll need to look out for. Each one has a name that matches the terrain in which you usually ride, so wet riding will need wet lube, dry and dusty riding (like off-roading) needs dry lube and wax is an in-between that works for both terrains – just not as well.
- Rags
These will be used to do some standard clean-up and wiping down everything. They’ll need to be thick enough to mop up any mess but, otherwise, any rags will do.
We also recommend working outside for this, although putting down some large, absorbent sheets will work if you’re based in an apartment or tight space. Fair warning: the job can be a little messy as working with such small components can mean you will need to be a little more liberal with the application of your cleaning liquids.
Best Way to Clean Bike Chain
The best way to clean bike chain is always going to be the most thorough. However, this can take a very long time (with many regular cyclists dedicating an entire day to working on and cleaning their bike), so we’ve given you three different options. All of these give you decent bike chain maintenance methods but the least intrusive will require more regular top-ups, so the choice is entirely up to yourself.
The Quick Way
If you’re short on time, this will be the quickest way to clean your bicycle chain. It isn’t, however, a very in-depth method. So, you might find that you’ll need to do this more frequently if you don’t have the time for a deep clean.
- Start off by popping your bike upside-down to make the chain easily accessible to yourself.
- Place a lint-free cloth or rag around the chain.
- Back-pedal your bike so that the chain works it’s way through your rag.
- Throw away your rag and repeat the two previous steps, until your rag is mostly clean.
- You can use your rag to wipe down the wheels, pulleys and chainrings while you’re here.
- Once you’re happy that the chain is clean, you can start applying your bike chain lubricant.
- Liberally apply your lube, before wiping down any spills.
- Place your bike back to the right way up and enjoy your ride.
If you’re using an oil-based lubricant, you might notice that further dirt will float to the surface, which may mean that you would like to use this opportunity to clean your chain further. Should you decide to wipe down your chain again, you’ll need to re-apply your lube. Just be aware that this can lead to a long, arduous task of continually re-applying your cleaner and lubricant until the chain is completely clean – so you’ll need to decide when enough is enough.
Some bike chain lubricants also double-up as degreasers, so using these for a quick clean up can be preferable to buying the individual items. Again, they won’t be as thorough as purchasing individual types, but they can save you a lot of time during quick clean-ups.
The Moderate Clean
If you’re looking to give your chain a pretty thorough cleaning, so that you don’t have to keep stopping and starting with clean-ups, the moderate clean is the way to go. This is a great way to clean your bike chain without actually removing the chain.
This is also the preferred method for racers, as a thorough clean can be presented without taking a great deal of time. Thus, it is our preferred method, when you don’t need a complete clean – especially if you aren’t a professional rider or looking to improve race times.
You’ll need a few extra items to complete this method, including a hose, air compressor (not essential but handy to have), container for your degreaser, a chain keeper and a stiff brush to get between the links.
- Take off the rear wheel of your bike and place your chain keeper in it’s place. This will protect the other components on your bike and allow for a more thorough cleaning.
- You can use your bottle-holder (if you have one) to hold a container full of degreaser, which means there will be less back-and-forth during this next part.
- Using your stiff-bristled brush, work along your chain and pulley to remove the grease with your preferred degreaser.
- Then brush your degreaser over the chain, making the effort to get in between the links themselves.
- Back pedal your bike so that the chain moves along at a nice, slow pace as you go along.
- Rinse off your excess dirt and grease with a hose. You shouldn’t need to use a high-powered stream here and, if you find that the dirt won’t be removed unless the water increases pressure, you may need to repeat step 4.
- Use your rag to dry everything as much as possible. Your rag should come away nice and clean at this point – but, if you spot plenty of muck, head back to step 4 and try again until the cloth comes away clean during this step.
- Apply your lubricant at this point and be sure to get into every link.
- Remove the chain keeper and replace your bike wheel.
You can use your air compressor to dry out the inner parts of the chain and components, but this isn’t strictly necessary. We don’t, however, recommend leaving your bike out to air-dry unless you live in any of the warmer states and are confident the bike and chain will dry quickly.
If you aren’t confident with your ability with a standard brush, you can always purchase a bike chain cleaner. These close around your chain and use a series of brushes within the contraption to get into every miniscule part of the chain itself with no effort from yourself. Simply backpedal the bike through the cleaner.
The Long (But Detailed) Way
If you’re still not satisfied with the depth of cleanliness on your bike chain, then this is the method for you. This is the longest method and requires some basic mechanical know-how, however you are less likely to deal with any chain-related issues after doing this.
You’ll also be pleased to know that you won’t need to do this method as often, which makes it ideal for those who might only have a day to spare from time-to-time. We would, however, recommend that this method only be completed outdoors, as things can get a little messy.
For this method, you’ll need considerably more tools, as well as those mentioned above, to remove your cassette, chainrings and cranks. These will be individual to your bike model and brand, so check your guidebook or look online to find the best options for you, if you don’t already have these. Another good item to have is a standard toothbrush, for detailing.
- Remove rear wheel and cassette.
- Remove your chainrings from your crank (you may need to remove your right-side pedal first, depending on your model).
- Clean the pulleys and cage with a spare rag. Your compressed air can come in handy here, as it’ll be able to shift some of the tougher chunks of dirt.
- Place your chain and smaller components in your container, which should be full of degreaser.
- Leave these to soak for a good while. You can focus on your larger parts in the meantime.
- Use your brushes to clean around the area, so that the clean components aren’t contaminated when the chain is replaced.
- If you feel your smaller parts and chain still need more cleaning, you can use your toothbrush to work through your parts after removing it from the container. If you have a lid, you can also give the entire container a good shake to give it a helping hand.
- Thoroughly rinse all of your parts – and your bike – with water.
- Ensure your parts are all completely dry.
- Replace your parts in reverse order of which they were removed.
Ultrasonic cleaners are also becoming an increasingly popular method for cleaning your bicycle chain, but this is an entirely personal choice. You can use these in place of the container full of degreaser, but they may not be as thorough.
Bike Chain Maintenance
While it’s one thing to know how to clean bike chain, regular maintenance for your bike is important, regardless of how dirty it looks. If you think your bike chain looks worn at any time, it’s important to simply throw it away and grab yourself a new chain, to avoid any risk of injuries. Signs of wear and tear include stretching and rusting – and any wear that exceeds 0.8mm will require an immediate replacement.
Originally posted 2023-12-02 01:30:21.