Something which is often overlooked is the wheels of your vehicle. Dusty, old alloys are going to make your car look pretty tired. Mechanics can charge top dollar for wheel refurbs and replacing them can also be expensive. In this guide we talk about how you can refurbish your wheels at home using tips and tricks to make them gleam.
What You Need To Refurbish Your Wheels
- Primer
- Colored Paint
- Clear Coat
- Sandpaper
- Alloy Repair
- Jack Stand/Wheel Removing Tools
- Masking Tape/Playing Cards
- Cleaning Materials
- Sanding Mask
- Gloves
- Protective Clothing
Steps to Refurbish Your Wheels
Taking on the job to refurbish your wheels isn’t too difficult but there are several stages involved and steps to take to ensure that the job is done properly. Make sure that you have everything you need in one place and adequate space to sand and paint your wheels. Each wheel can take around x 4 hours to complete so you might have to refurbish them in stages and not all in one day.
- Remove Wheels
Some people like to refurbish their wheels whilst still attached to the vehicle but this isn’t ideal. You’ll definitely be able to get a better finish if you can properly move the individual wheel around. You’ll also be able to move the wheel to a place with plenty of natural light too so you can properly see what you’re doing.
So, we recommend removing your wheels individually. You can remove the alloy from the tire but this is necessary as long as you mask the wheel.
- Clean
One of the most important jobs in refurbishing your car wheels is to make sure that they are cleaned thoroughly. Don’t rush this stage as a dirty car wheel will only create a dirty base for the paint and that will just waste your time in the long run. The first job is to ensure that any chunks of dirt are removed from the tire. You can use a wooden chopstick to remove chunks from the actual wheel and warm soapy water. Road dust and dirt is normally removed easily, the problem tends to be brake dust which can really build up over time and create problems. To remove brake dust you may need a special cleaning fluid. Make sure that the wheel is as clean as possible as otherwise you won’t get a good finish on the paint.
- Mask
The next stage of diy wheel refinishing is also vital and not a step that you should be tempted to skip! You’ll need to make sure that your wheel is totally clean and dust free. The wheel will also have to be dry for this stage as otherwise the masking tape will not stick to the wheel. The aim of this stage is to place masking tape around the tire so only the alloy is visible. This is to ensure that you don’t get any paint or primer onto your tire and you get a nice clean finish. You can use masking tape or…bizarrely…playing cards! Yes you heard us right! A pack of playing cards can really come in handy at this stage as you can slot them into the gap between the wheel and the alloy and sort of “fan” them around. You might need to deflate the tire a little so you can easily reach all parts of the wheel.
- Sand
Even if the alloy looks like it’s in pretty good condition it will still need sanding. Make sure that you have a good selection of sandpaper in various different grits. If your wheel is corroded or has flaked paint then you will need a coarse sandpaper to start with to sand down to the bare metal. If the wheel isn’t too bad then use the coarse paper to smooth down the surface and prepare the wheel for the filler. Remember: the lower the number the coarser the sandpaper. If you’re unsure which type to use then test on a small area first. Wipe the wheel down with a dry cloth afterwards to remove any residue from the sandpaper.
- Fill
As your car wheels sit close to the ground they are likely to pick up defects and curbing marks. If you haven’t been able to smooth these over using the sandpaper then the choice is yours to either paint straight over them of fill them using a special car body filler. Small scratches might not look so obvious but with larger defects it’s definitely worth using a filler so you get a smooth and professional end result. Alloy wheel scratch repair fillers all have different instructions when it comes to usage and drying times so you will need to follow the specific instructions from the filler and usually allow up to 48 hours to dry. Again, it’s important not to rush this stage. When the filler is dry then you’ll have to go back to the previous stage and sand down the filler so you have a nice smooth surface. Start with a fine sandpaper as coarse paper may remove the filler and then you’ll find yourself back to the start again! Wipe down the surface with a dry cloth to remove any residue.
- Prime
You might need to wash and dry your wheels again before priming them for paint. It’s important to remember that a clean wheel, free from residue will give you a better, more professional looking finish. So rather than see cleaning as a chore, think of it as part of the end result. Also, dust can make primer defective and so it’s pretty essential that the wheel is free from any dirt and dust that it might have picked up from sanding or filing. Never use a primer too close to a wheel and always ensure that you shake the can well. Spray the wheel using a smooth, even motion. Always apply thin coats as this will ensure a smoother finish. You will probably need to apply around 2-3 coats but some people like to add more. Allow the primer to dry thoroughly between coats and then once you’re done you can use a very fine grit piece of sandpaper to smooth out any uneven surfaces.
- Paint
When people ask how to refurb alloys at home they are often unaware how simple the process is. That said, there are quite a few stages that you must go through before you can get to the painting stage. It’s a time consuming task but totally worth it for the end result.
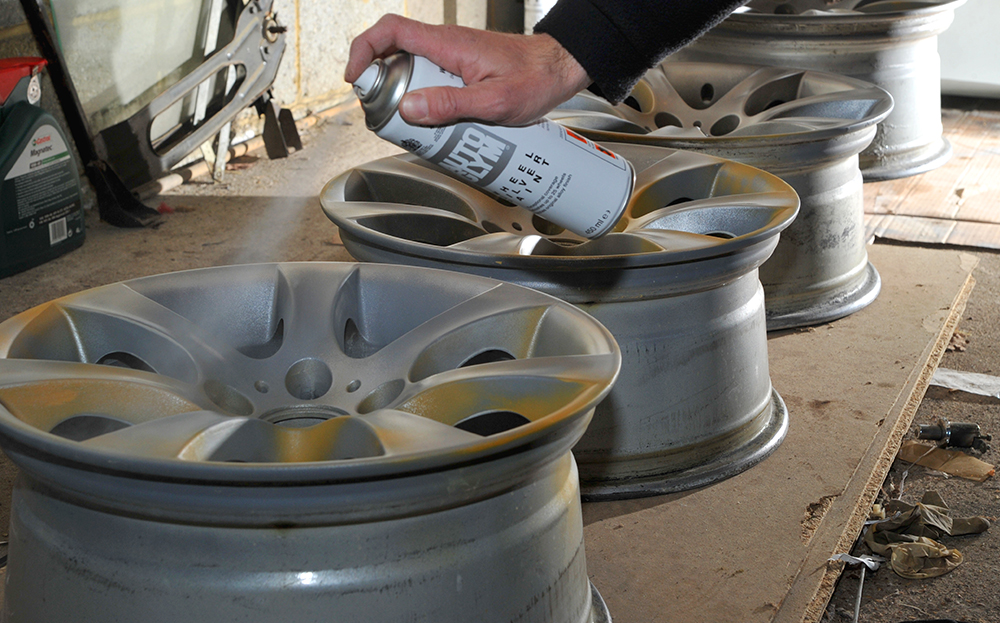
At this stage you can choose which type of paint you might like to use. The type of paint available for alloy repair is normally powder coating or rattle cans. Rattle cans (or spray cans) offer much more value for money and they’re definitely considered to be the easiest type of paint to use for this job. We recommend this type of paint as you can get surprisingly professional looking results, fast. The most important thing that you must check before spraying your alloys, is to check that the primer has dried thoroughly. Any sand, dirt or wet primer at this stage could ruin the entire paint job!
Shake the can well to wake the paint up and apply several even coats. Don’t add too much paint to one specific area of the wheels, ensure the paint layers are thin and never spray the paint too close. You want to use a kind of smooth sweeping motion to get the most even finish.
- Coat
If you’re happy with the results you are then ready for the final stage. If you’re not so happy then you may need to add an additional coat or use a fine grit piece of sandpaper to smooth the surface down and start again. The final stage in diy wheel refinishing is to coat the paint with a protective layer. Make sure that the paint is completely dry – this may take up to 48 hours but the longer you leave it the better. You can leave the wheel in a warm place near a radiator to speed this process up. Find the best wheel sealant on the market and apply a coat or two according to the individual instructions. The job of a wheel sealer is to create a hard protective layer over the paint which will protect it against the environment.
- Finish
Once you have cleaned, sanded, primed, painted and sealed you can then remove those playing cards and treat yourself to a well deserved game of poker! On a serious note, this is the fun part as you get to see the fantastic paint job you have done with your own hands. Put those wheels back on, stand back and now it’s time to appreciate your handywork!
Originally posted 2023-11-06 07:38:11.